

The cardboard chair is one of the most popular items on my web page. I fairly frequently receive email asking me how to make the chair, which previously I've had to decline since there were no written instructions or plans. The chair was designed in my head. Here is a `Frequently asked questions list' ending with suggestions on how to make the chair. I supply the information as is for those of you out there interested in making a cardboard chair or, as in most cases, those of you who have been told to make one for a school project. If you make one, please tell me how it goes (and credit me). The design is copyright but made available free for non-commercial use.
How did the chair come about?
The cardboard chair was made after I moved to New York with nothing but a 150lb shipping allowance. I had no furniture in a bare apartment just four cardboard boxes and their contents. After a while I realised that turning the packing boxes into furniture would solve the problems of their disposal and my lack of furniture. I had four packing boxes and wanted four chairs, so I made my design with the constraint that each chair had to be made from a single box.
Can the chair support someone's weight?
Yes. Certainly someone up to 180lb without problems. After a lot of use the first couple of chairs became very wobbly and were retired from service, but this version includes some design improvements that make it more stable.
Is there any other support to hold the person's weight?
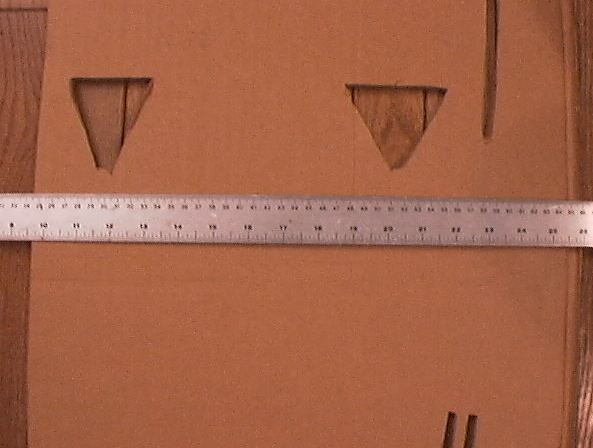
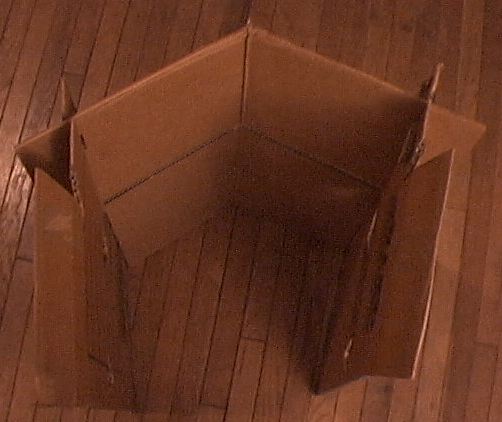
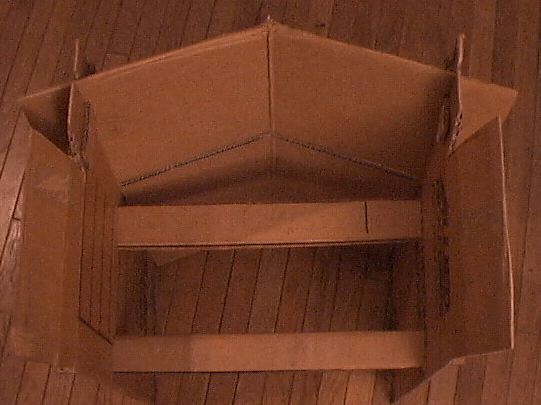
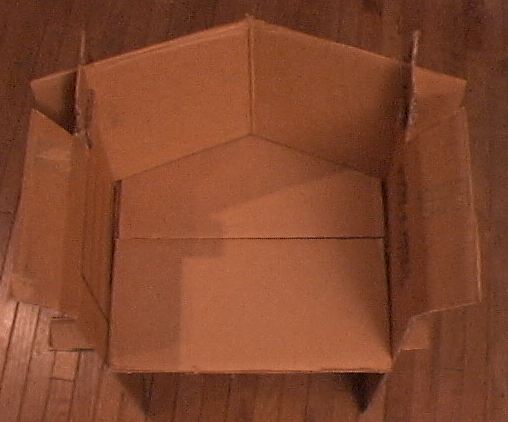
The chair consists only of cardboard. The person's weight is supported by the cardboard. The design uses triangular beams of cardboard to transfer the person's weight to the vertical sides and thence to the ground. Beneath the beams is an empty space. The cardboard is fairly sturdy double-ply corrugated cardboard.
How is the chair held together?
There is no tape, glue or other fastener used in its construction. Natural properties of the cardboard are exploited (sturdiness, stiffness, springiness, friction, weight).
Can I get instructions or plans to make the chair?
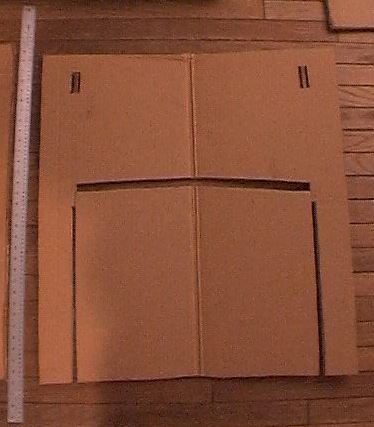
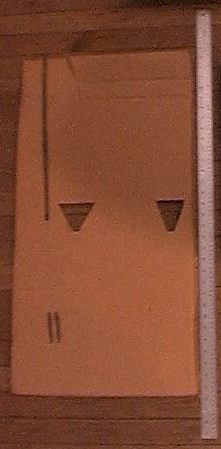
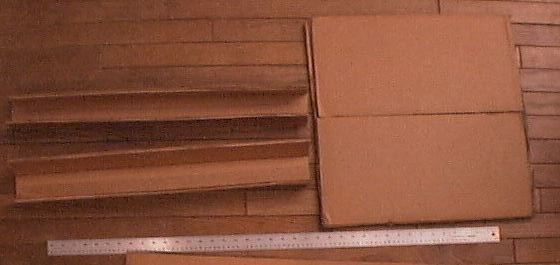
There are some instructions and photographs of the parts below, along with dimensions. There is now a diagram to show you how I made the parts from the box, with more dimensions.
What tools do I need to make a cardboard chair?
I made my chair using just a pen to mark lines and a utility knife.
How does all that cardboard come out of a single box?
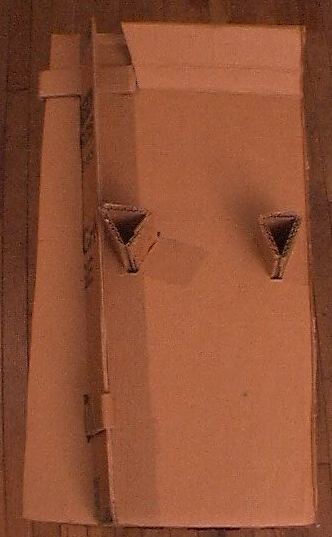
The seat is the lid of the box. The back is two sides with the corner of the box being the bend in the middle of the back. The sides are the two remaining sides of the box. The triangular beams come from the corners where the back meets the sides. One of these has the seam where the box was joined, so has two layers.
What happened to the bottom of the box that you didn't use in the chair's construction?
Well spotted. One-and-a-half box-bottoms were enough to make the recycled materials fruit bowl shown on another page. Other bottoms went to make a stereo stand of which I don't have pictures.
How do I make a chair?
The following provides some hints on how to make a chair. I apologise for the grainy photos that were taken with a cheap digital camera without enough light. The ruler shown for scale is 1 metre long, with markings in inches and centimetres. No attempt was made to make sure the photographs were taken from the same distance, so the scales of the photographs vary. There's some optical distortion, but I believe the pixels are square. On the other hand some shots aren't taken perpendicular to the plane shown.
Trying to copy my parts exactly probably isn't a good idea. You have to make the parts to fit one another. Obviously I can not be held responsible for any damage or personal injury incurred as a result of your trying to make or use a cardboard chair. Utility knives are dangerous things, and I can't be held responsible for any lack of structural integrity of any chairs resulting from even strict adherence to the suggestions below.
However irritating it may be, I strongly recommend that you read through all of these instructions and make sure you understand them before starting on construction. Pieces have to fit together and the reasons for a part being a particular size may not be apparent until later on.